Wonderful little half-frame film camera by Kodak – EKTAR H35

0 0
Read Time:1 Minute, 54 Second

It’s been over half a year since my last blog post in 2021, and I apologize for the long hiatus. I’m thrilled that you’re visiting my blog for my Fujifilm Film Recipes, but I’m also excited to share my experiences with film cameras. Over the past few years, I’ve experimented with various film cameras and scanned the films using my Nikon CoolScan V. Unfortunately, due to personal reasons, I haven’t been able to devote as much time to photography as I’d like. However, I’m ready to reignite my passion for photography and get back into the swing of things.

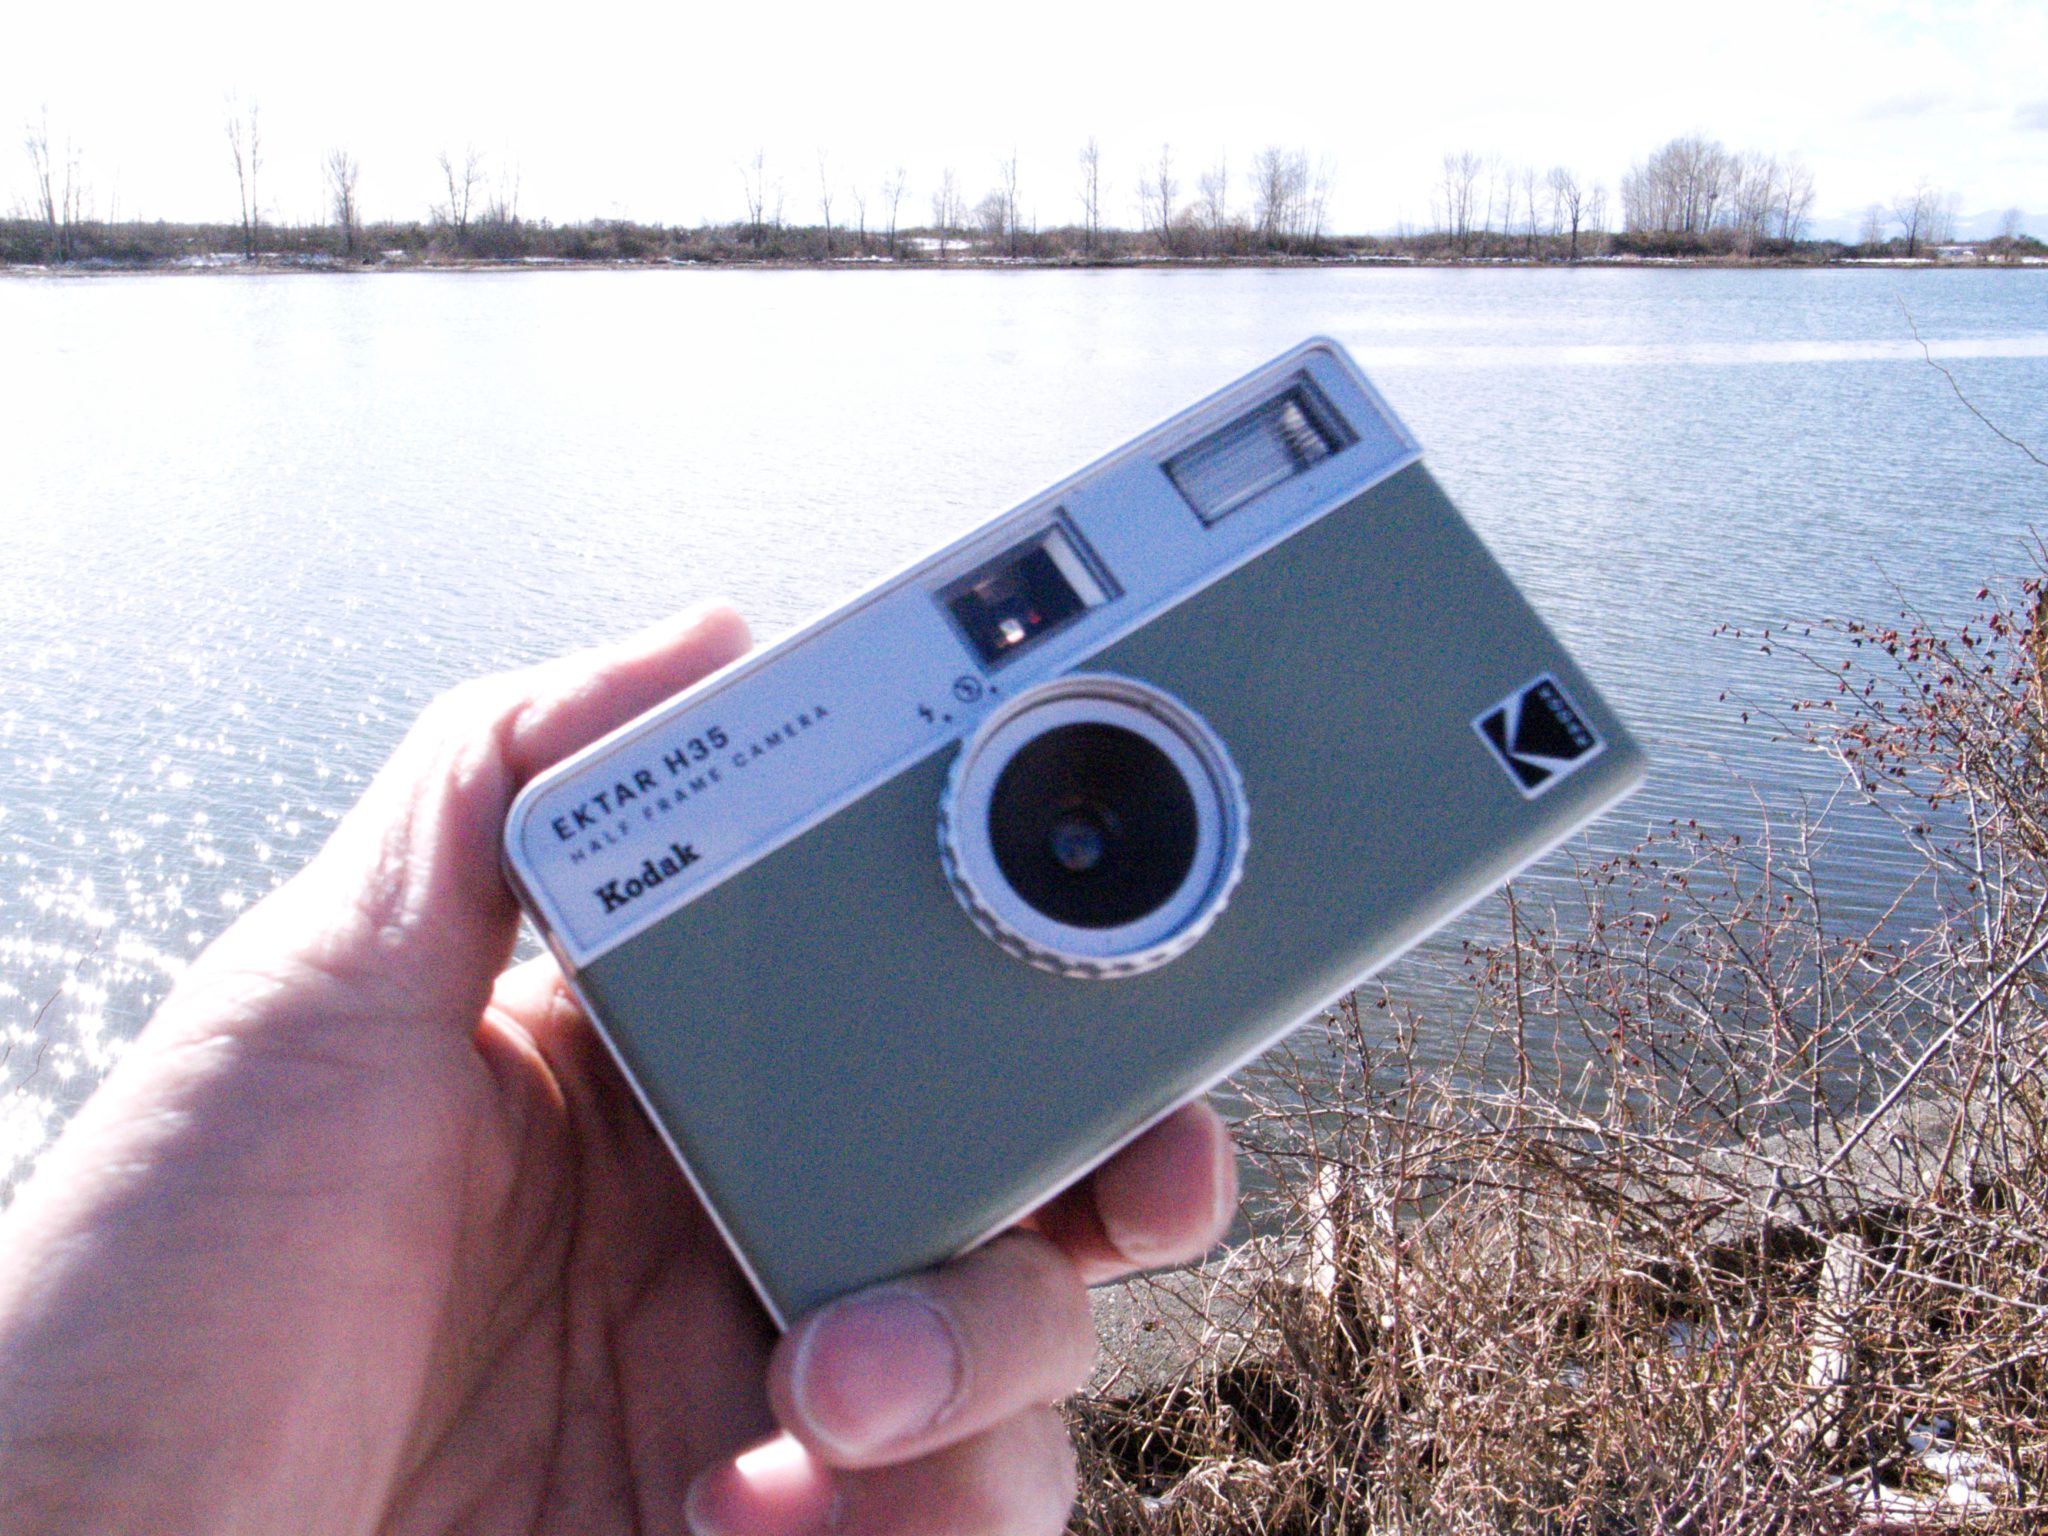
I’ve accumulated several film cameras, including the Leica M4-p, Ricoh GR1s, and Olympus XA4. Recently, I’ve been intrigued by the Kodak EKTAR H35, a new camera with a vintage look and a half-frame 35mm format. Hope this reliefs the pains of the skyrocketing costs of film.

The Kodak EKTAR H35 is a lightweight, plastic construction, and the vintage looks is appealing. The lens has a focal length of 22mm and a fixed aperture of f/9.5, and the shutter speed is fixed at 1/100s. The camera has minimal controls, with only an on/off switch for the built-in flash, allowing me to focus on composition without being distracted by camera settings.

KODAK EKTAR H35, Half Frame Camera. “Double the Fun!”

Based on my personal preference, I’ve chosen ISO 200-400 film as the most suitable film for the Kodak EKTAR H35. For my first roll, I’ve selected Fujifilm X-TRA 400 stock film, which I’m excited to shoot with. With a fixed aperture and shutter speed, ISO 400 is more appropriate for Vancouver BC’s ever-changing weather conditions, especially since it is hard to take 36 shots (or 72 for half-frame) within certain period.

I took these photos in late winter, which was a sunny day that’s been rare since autumn. It was the perfect opportunity to test out the Kodak EKTAR H35. I had the photos developed and scanned by a local shop in standard resolution (around 1MB per file), and they are just “untouched” since I received the scanned images.

000879310028

Image 1 of 33

I hope you enjoy the selected photos, and I welcome your comments and feedback.

Brownish, vintage-look recipe using Classic Chrome, inspired by the result of SilkyPIX Raw Converter!

11 0
Read Time:1 Minute, 37 Second

While I’m still in love with my Natura 1600 recipe for most of my leisure photowalks, I’d love to keep exploring any other settings that could make my photos more creative. Personally, I prefer my photos to be saved in JPG SOOC as I am just a hobbist and don’t want to spend too much time in post-editing. I just want to express them in nice look & feel, rather than making them perfect for pixel peeking.

Having said that, I found myself recently addicted to post-editing on my Fujifilm RAW files using SilkyPIX RAW Converter, which is a free tool bundled with the Fujifilm camera with great features like batch conversion and native film simulation settings in more granularity.

After several trials on the SilkyPIX, I have to admit that I need to put more time in post-editing. The limited capabilities and granularity of the film simulation from the in-built camera may hinder the creativity and quality of the photos taken. They deserved to have better results when putting a little bit more time in post-editing. Again, my preference is to use minimal of my time to achieve the best available results.

Here are some samples photos, which first created by SilkyPIX, and later on I tried to create a Fujifilm film simulation recipe for leisure shooting with fun.

Left: Result from SILKYPIX, Right: Result from my recipe applied from Fujifilm XRS

Left: Result from SILKYPIX, Right: Result from my recipe applied from Fujifilm XRS

Left: Result from SILKYPIX, Right: Result from my recipe applied from Fujifilm XRS

Left: Result from SILKYPIX, Right: Result from my recipe applied from Fujifilm XRS

Here are my “old” photos taken recently with my X100V, applied with this new recipe:

The X-Trans III or IV recipe for making these images:

Recipe for Browish, Vintage-look using Classic Chrome

Enjoy!